Thursday, April 14, 2016

Password Protect using Forms:

Google Forms is a great tool for assessments. One issue that came up in our digital learning environment is giving Quizzes/Tests that students can only access in class with teacher permission. The way we work around this is to password protect these quizzes/tests. Here’s how:


  1. Create a text question called "Password:" .


  1. Select Advanced Settings from the bottom left corner. Then select Data Validation.


3. Select Text and Contains
.

4. Put your Password in the TEXT field. 
Custom error text allows you to create a message that appears if the password is typed incorrectly.
_________________________________________________________________________________

Final note: I post my quiz on the page after the password. The Add section button at the right allows you to create a second page to your form.


Happy Googling #nextgenhs - @Mathmitchellr


Wednesday, April 13, 2016

What's In Your Space- It has finally arrived!


Let's be honest, teachers did not enter the education profession for the money. It's kind of a big deal when the school budget allows for school tools and teachers LOVE supplies.  Sometimes all it takes to make a teacher's day is a box of pencils or some new dry erase markers. So the "tool" I have been waiting for all year has finally arrived.  Yesterday in my school mailbox I got a new teaching book.

If you have been reading this blog you know that we (the co-authors of the blog) work for a school with two campuses. Ryan Mitchell wrote a fabulous viewpoint of traveling back and forth from each campus in his post Traveling Soldier. In the next three years we will merge the two campuses trading the traditional classroom for a open space and technology infused concept.

I am super excited to read this new release What's in your Space by Dwight Carter, Gary Sebach, and Mark White. I worked with Dwight Carter when he was a principal at Gahanna Lincoln High School and with Mark White when he was the superintendent at Gahanna Jefferson Schools. They built a new concept building called Clark Hall and it was quite the experience to see the project from groundbreaking, construction, teacher training, community acceptance, and implementation in education. The book breaks down the process into five easy steps:
1. Understand Generation Z
2. Start Asking Questions
3. Shift to a 21st Century Mindset
4. Teach Global Skills
5. Let Students Use Technology

I am very excited to witness a similar physical and cultural change in the education setting at Delaware Area Career Center. This book will be a great resource for DACC teachers and staff as we move closer to the merge of the two campuses!


#nextgenHS
@MrsBKelley1


Monday, April 11, 2016

Easy tool for making the switch to Google

A lot of educators and administrators see the task of converting all their documents to Google formats to be daunting. With this quick 4 step  process is made easy.

1. First open up your Google Drive.


2. Select the cog in the corner of your drive


3. Next, select the "Settings" option


4. The setting menu will then appear, from here make sure the box next to "Convert uploaded file to Google Docs editor format.

Once this setting is enabled all Word documents and PowerPoints uploaded to Google Drive will automatically convert and your work will be completely ready to implement. Big time saver and a big hit with our staff who thought it would take too long to convert all their hard work.

Friday, April 8, 2016

Making the Switch To Google


Getting a staff on board to make a switch to a new technology can be incredibly difficult. Especially when that group is a made up of a high percentage of "seasoned" educators. Our small district had been using the Blackboard Learning Management System (LMS) for the past 5 or so years. Many of our staff had slowly been building curriculum on the LMS. Starting in the 2014-2015 I piloted the HP Chromebook 14 with a group of freshman as well as some of our other teachers piloted it with a small group of 25 seniors. With the success of our pilot and the opening of our new academic area our school decided to go essentially all in with Google Apps for Education.

How we got buy in...

The original pilot was a lot of trial and error. Our biggest mistake was not seeking out any formal professional development. We thought since we had a working knowledge of Sheets, Docs and Slides we would be good to go. It took us a while to realize the great potential in Classroom and Forms. 

Near the end of our pilot year, we realized the potential we had in changing our school and the way we delivered content. We committed to buying more Chromebooks for both campus and we were on our way. 

Our first step was creating a "Google Team." This consisted of teachers who had either incorporated GAFE apps into their classroom during the pilot or were comfortable enough to help other instructors learn the basics of the apps. The group was led by one of our tech department members who has been one of the most helpful an supportive people I have worked with in education. Having a tech member on our side when the rest were very pro Microsoft was a Godsend.

Using the "Google Team" and a generous stipend from the school we offered a 2 day teacher training day before the school year began. During our two day together we covered the basics of all things Google. From Sheets, Docs and Slides to the newer Hangouts and the almighty Classroom At the conclusion, each teacher had the basic tools needed to start their journey into all things Google. 

Along with attending our training before the school year, teachers were required to meet these basic requirements throughout the year to qualify for the stipend:
1. Utilize Google Forms as a formative assessment tool in the classroom.
2. Create a Google Site or a Google Classroom to centralize information for your students.
3. Create a Google Calendar that is shared with your students. Include assignment due dates and other
reminders that are pertinent to your class.
4. Create and facilitate opportunities for student collaboration in Google Drive.
5. Use GAFE to collaborate or share with your PLC’s and other teacher teams.
6. Explore Apps and Extensions that may be useful in your classroom, and find a way to integrate them.
With these goals in mind we were off and running with our first full year of school wide access to GAFE. Each student and staff member was given their Google account at the beginning of the year with no mandated expectation of use. At the beginning of the year, GAFE was used primarily by almost our entire academic staff. Some much more so than others but by the end of the first quarter all academic teachers had attempted to use it at least a handful of time. Second quarter is when things really took, as lab instructors, many of whom did not buy in at the beginning, began to see the ease of use and the opportunities. They saw how quick the chromebooks were to log in and how students were quickly proficient in using them. Many of them who had not come to the before school training were now interested. They began asking questions, meeting with our "Google Team" after school and on planning periods and asking for more PD. Now we had them...

Next Steps

Half way through the year, we provided a Google Workday. The concept was just an open day where staff was able to meet with a "Google Team" member and work on whatever they wanted to continue the journey to all things GAFE. Topics ranged from how to upload files into Drive to how to differentiate for students using Google Classroom. Many of our instructors, both academic and lab, were hooked. Since this training, the chromebooks we have available for any teacher or student are signed out before school even starts. Lab instructors are lining up waiting to get their hands on them. This is exactly how we wanted it to spread, organically as they saw the benefit not forced and mandated. 

Next Year

We are looking to grow the use even more. We have around 80% of our labs using the chromebooks weekly, some who incorporated technology sparingly in the past so we feel we've been pretty successful from that stand point alone. Two labs have decided to actually write the purchasing of chromebooks into their student fees so that every student, both full day or half day will have access. We're also planning more work days in the future to hopefully have 100% buy in. For the more veteran "Googlers" we are continuing to self evaluate and look at add ons and apps that can further the educational experience for our students. We will sit down sometime before the end of the school year and finalize a plan moving forward. Lots of exciting stuff to come, more blog posts as they come.

Quick advice for those looking to take the Google plunge

  1. Create a team of "experts" who work well with other staff members and are passionate about ed tech
  2. One of the biggest complaints I hear from educators is "I don't have the time," find time in your PD schedule to dedicate to just working. It was a big hit with our staff and we saw things take off after this day. 
  3. Level your PD for staff. We provided everything from beginner sessions to advanced sessions to keep everyone engaged.
  4. Get buy in from tech staff from the beginning having these guys on board from the start makes things go much smoother. 
Good luck and feel free to contact any of us for further advice...Happy Googling!

Thursday, April 7, 2016

Traveling Soldier


If this is your first time reading this blog, stop. Read the previous posts written by Brian Hale (@MrBHale) and Briana Kelley (@MrsBKelley1).


Welcome back. As a first time educational blogger, my introductions are admittedly a little weak, but like James Harden’s defense, I need time to develop. Okay, horrible analogy. You’re either thinking “Who the hell is James Harden?” or “James Harden’s defense will never develop. He’s a dominant attacking force in the NBA who would help his team more by cooking up one of his signature dishes than playing his version of defense.”


I digress.


Our district has adopted a mindshift to a collaborative, blended learning environment. This mindshift is forcing our staff to rethink how we educate our students. For the next few years, we have a little taste of both styles of education at our school. These styles are separated by two campuses - North and South. This school year I am assigned a “traveling schedule”, meaning I spend my morning at North campus and afternoon at South campus. I’d like to briefly outline my unique school day. I hope you find it as interesting as it plays out every day.


NOTE: This is not a persuasion post. I’ve designed this post to give you a taste of my day (beware -- future posts may involve heavy persuasion).


North Campus

This campus is structured as a traditional high school - 40 minute class periods, 9 periods in a day, etc. Here I teach Algebra 2 and Precalculus to juniors and seniors.


Here is a peak into my classroom:


South campus:


This campus is designed for a cohort learning environment with a blended, online learning approach. No bells. No class periods. Just time and ample space. The academic team has one general academic area with two smaller classrooms available to pull groups of students out for smaller instructional opportunities.


Here is a look at the academic area:


Three biggest differences from traveling between these two learning environments:

  1. One-on-one availability-
The traditional 40 minute class periods at North campus lends itself to more direct instruction. The cohort learning environment at South campus allows for much more one-on-one time. About 95% of my time at South is available for one-on-one time with students.


  1. Student pacing -
My class North campus is set up for one lesson per day. Students are all working on the same assignments at the same time, taking quizzes/tests on the same day, etc. South campus students are working at their own pace through the curriculum. There are minimum due dates, but students are allowed to pace themselves through the lessons and assignments as they see fit for their schedule.


  1. Flexible grouping sessions -
The North campus traditional schedule has assigned students in each classroom. From there I am able to group these students as I please. The South campus environment allows me to group students however I need.


As you can see, the uniqueness of my schedule allows me to experience two completely different styles of education in the same day. In two years, our district is combining into one campus and adopting the cohort, blended learning approach. Though I’ve tried to remain impartial during this post, I will say that I’m very excited and look forward to this consolidation.


@MathMitchellR - Mathematics Instructor

When you teach...sheet happens.

Some teachers prefer having a spiral bound grade-book.  At the beginning of the year you write all your classes at the top of the pages.  You use your best handwriting to list your students in alphabetical order.  Some grade-books are color coded using different colored pens, colored pencils and riddled with post it note tabs. Towards the end of the year pages are folded over, Names are crossed out for a student who left and new names were added to the bottom of the list (new students who threw off the alphabetical order you used to have). The is a coffee stain from a late night of grading that has permanently warped the pages for periods 3-5.  Good intentions- now a mess.
So here is a solution- Sheets.  I would know. Some people call me the queen of excel sheets.  To be honest, I am not.  I use Google sheets as a glorified chart.  But there are a few tricks I have used and the organization is always clean, neat, and yes, color coded. Now as an intervention specialist, in my situation I don't have a grade-book per say, but I do have a lot of data and the organization is similar to what a teacher with a grade-book likes to have.  Without further ado- here is a sample of my top priority saved sheet.  Of course, names and information has been changed.  I'll show a sample of each tab and have some nifty directions too!

Tab 1- Goals and Accommodations


In my first tab I have some basic information about my IEP students, what intervention specialist I should contact, what lab they belong to (or homeroom teacher would be appropriate), a list of their accommodations and IEP goals, plus testing information. This sheet is shared with other teachers and is a great go to reference for teachers that don't like to comb through multi-page documents to find out accommodations.

Tab 2- Advisory Check-in

So this one is a great one for a traditional teacher grade-book. I use it to track my weekly conferences with students but the "check in" dates could easily be changed to assignments. Reasons to use sheets instead of tabs?  When students leave a classroom or new students are added, rows can be deleted or added to keep the alphabetical organization. You can see I have changed the months to different colors.  I really like this feature and could work for assignments by having each unit a different color.

If you hover over the top row where the cells are labeled A, B, ... you can click on the downward arrow for additional options. The choices I use the most are sorting and hiding. If I wanted to sort my sheet alphabetically by first name I would select column B and choose sort sheet A-Z.  If I wanted the sheet sorted by student ID, I would select column A and sort sheet A-Z.  If I thought I had too much information on the screen and I didn't need to always see the student ID the first name and the Lab (homeroom) I could select these columns and choose hide.  The information is still there but will not appear until I select unhide.  Nifty, right?


Want another tip? Freeze. So the information usually at the top and along the left side is usually important- you want to see it all the time. If you highlight a row or column (or even multiple rows or multiple columns) you can click on VIEW, FREEZE and then select which rows or columns you want to freeze.  These freezes cannot occur in the middle of a page but you can select as many rows/columns you want frozen starting from the top (like rows 1-3) or the left side (like columns A-D). This is a nice tip when you want to always see student names on the side or assignment names up top.

Tab 3- Due Dates


Alright, so my next tab is Due Dates.  As an intervention specialist I have lots of due dates that I need to keep track of. So far, everything I have shown in this post are my "glorified" chart tricks. One of the things that I like to use is automatic color changing codes. When I enter a date (or you can use grade values too) I can set the cell to change colors if the date is next month, this month, or past due.  The values can be set for different ranges so if a teacher wanted all grades below 60% to turn red- sheets can make it happen.  Click here to change cell color based on date proximity- great website!

My sheets are organized, quick to change from tab to tab (as opposed to flipping pages), easy to copy and paste information from one tab to another (like student names rather than rewriting them), and since I use Google Sheets, I can access the information anywhere at anytime.  This can be great when teachers want to work from home (happens all too often, am I right?), or even on my phone during fire drills.

I have other sheets that I am sure will appear in future posts but I'll let you process this for now. ;)

Feel free to comment with any sheet tips or if there is something you want us to detail in a future post!

#nextgenHS
@MrsBKelley1

Wednesday, April 6, 2016

Thinking Ahead for Next School Year

Wow. Only 33 more days of school for this school year!  The teachers are busy with testing season, final lesson plans, attempting to contain any spread of senioritis (which sometimes spreads to even the juniors!), and wrapping up any end of the year duties.  So naturally, yesterday I had a great conversation with the about the beginning of next school year!


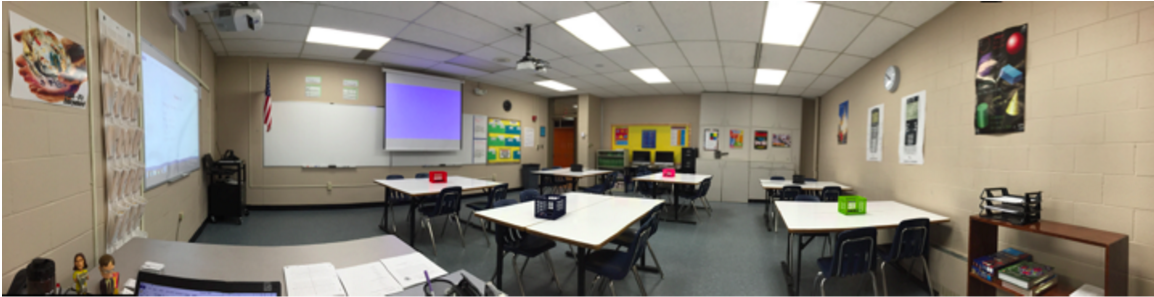
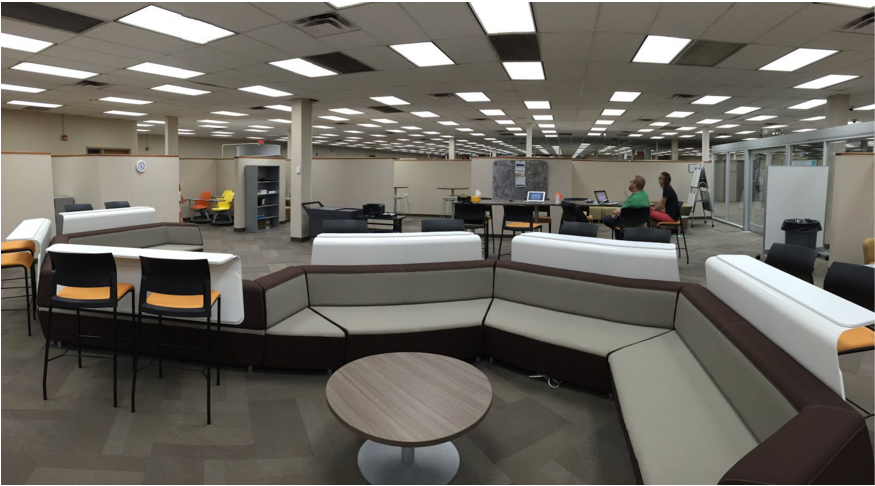
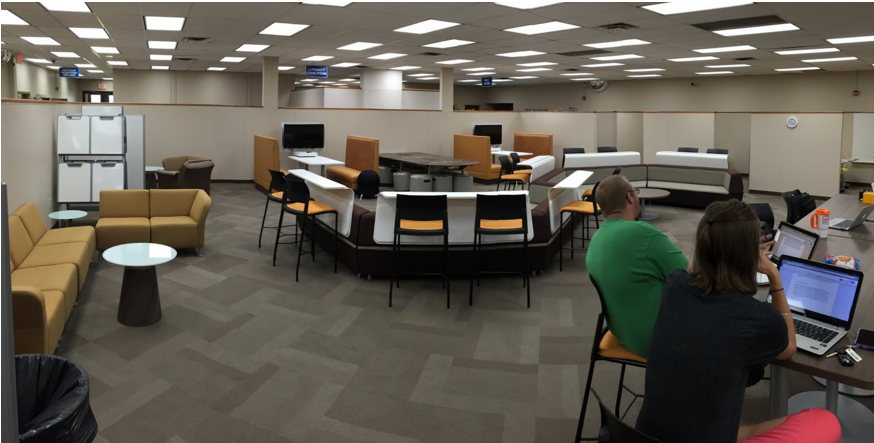
So just to recap- I work with a team of teachers in an open area concept learning space. We have couches, booths, small break out rooms, and high top seating to promote student selected small group learning. The students have online google classrooms where daily activities, projects, and assessments are assigned and submitted. The math teacher does a direct instruction session about once a week, English twice a week, Science twice a week, and Social Studies is almost exclusively online. Teachers have a projected calendar in the room as well as google calendars available through the online classroom to show all student assignments, due dates, and teacher scheduled pull out sessions. Next year we will have an English teacher, Social Studies teacher, Science teacher, Math teacher, Intervention Specialist with a full schedule.  Due to course needs we will most likely have a second English teacher and Math teacher for part of the day. We can have up to 75 students in the morning and up to 75 students in the afternoon. When students and teachers are not in a classroom for direct instruction, students have access to their teachers for any help or guidance in the large area learning space.


Now the fun part. Remember the first day of school when the teachers would introduce themselves, go over the syllabus, explain the rules, etc.? Well in this space, we have to be a little more creative since there isn't a traditional schedule and so many teachers/students in one space, I imagine it would be best to split the responsibility of shared directions. Here are my thoughts out loud- I am sure things will change and evolve over the summer but these are the needs I see for first day/week instructions next year.

Google Classroom: 

Students need to have a code provided by the teachers for the google classrooms.  In this session, one teacher can help all students enroll in their classes and explore the information from each class.  The students will have access to the class syllabus and can experiment with how to access an assignment, turn in an assignment, identify in an assignment is not completed, submitted, or late, as well as leave a comment for an assignment.  One challenge this year for teachers, was identifying if a student turned in an assignment late after the teacher already entered grades for the assignment.  We might come up with a shared practice of students commenting on the assignment so the teacher is alerted via email of the comment.

G-mail and Calendar:  

Students should understand how to use google email, and google calendar. One teacher will give a mini session on how to combine all their classroom calendars (for due dates and direct instruction sessions), as well as how to add a new event.  Students can even choose to sync the calendar to their phones.

Building Tour/ General Rules:

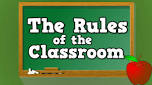
One teacher will  go over the basics of the academic area as well as make sure students know where the bathrooms, water fountain, and cafeteria are. Typical classroom rules apply: respect for teachers, respect for peers, respect for space.

Google Docs: 

Students will use google docs, slides, and sheets to submit their work online.  For the most part, these are similar to Microsoft Word, Power Point and Excel, but it is important for students to understand how to share with others, access from Google Drive, and organize these assignments into folders.


Like I said, this was the gist of a conversation and a little but of just "thinking out loud."  I am sure the first day ideas will change and evolve over summer.  These tools will be beneficial to share and explain with students to start the school year successfully given the space and difference of learning compared to a traditional classroom.

Any other thoughts?  Leave a comment! We would love to hear how others use a large space, flex time, and Google Apps for Education in the schools!

#NextGenHS
@MrsBKelley1